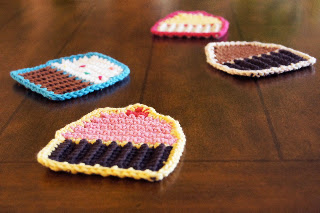
You heard right! Well, they’re not really for eating though (unless you’re a goat).
If you didn’t know, Brenda from Sweet Simple Stuff and I did a blog swap last week. Her blog consists of candy, baked goods, and lots of cute idea’s for sweets, so, for our swap, she posted some not so fat free granny squares, you can check them out here, and I posted a free pattern for my Crocheted Cupcake Coasters (that’s an alliteration for all you grammar geeks out there 😉
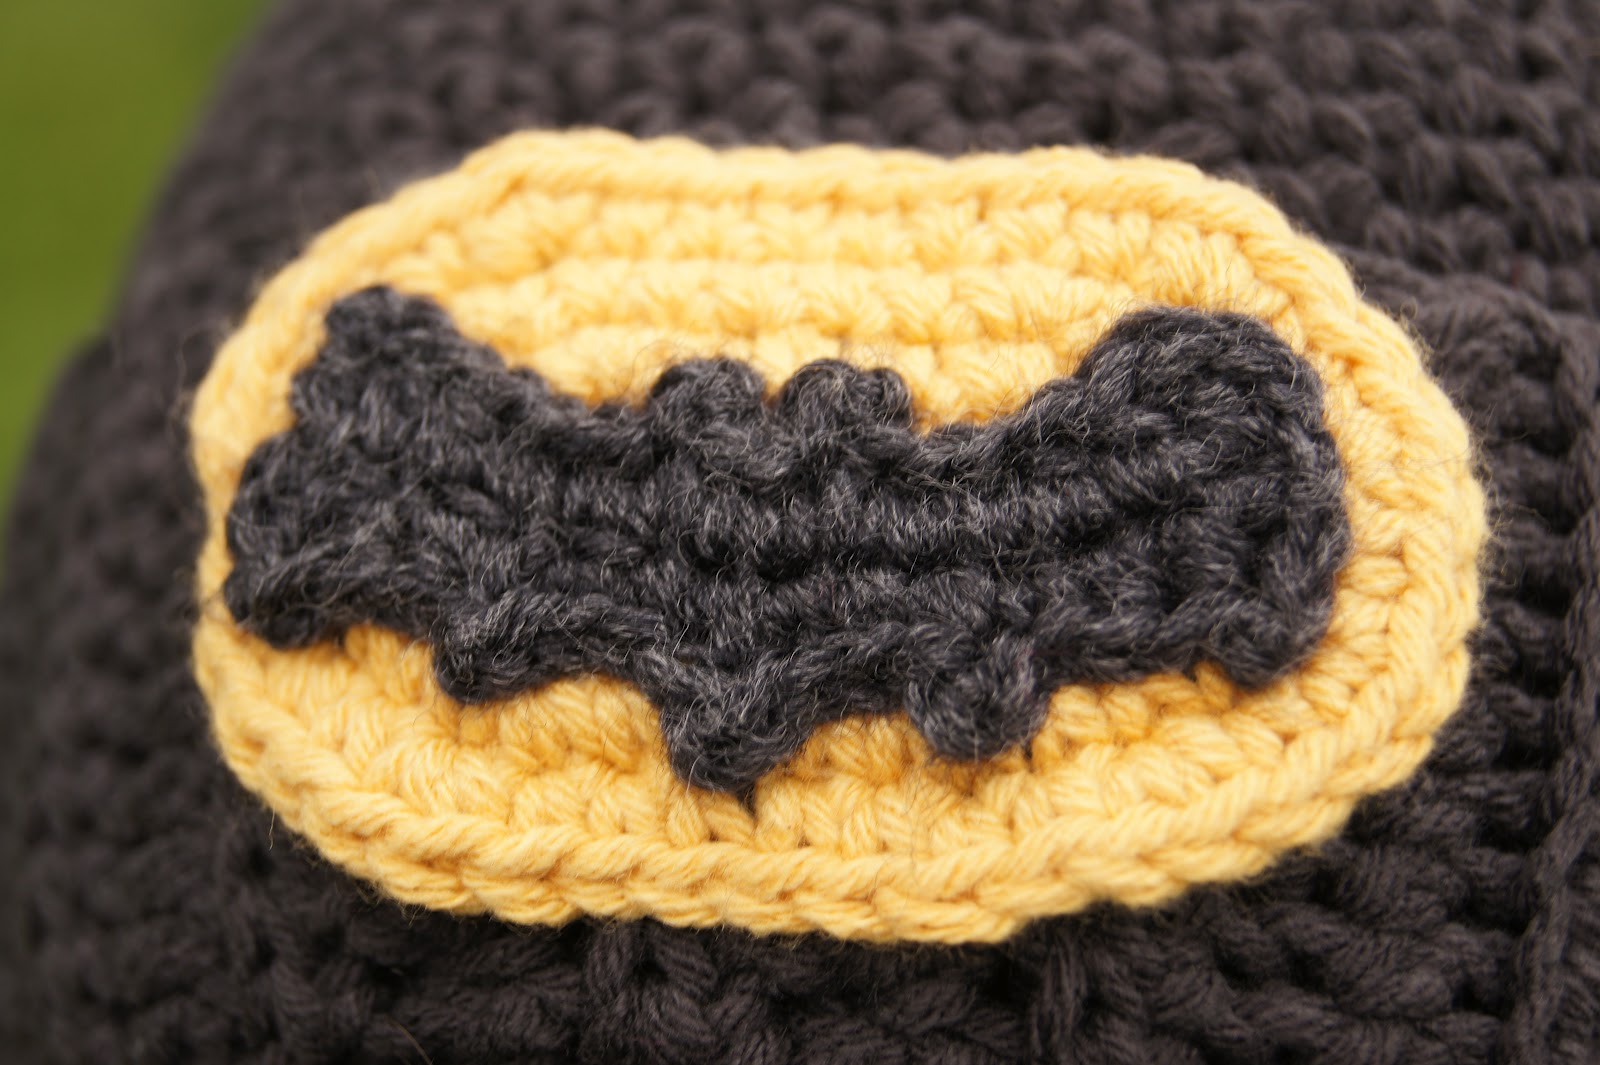
This Friday yet another awesome superhero movie of this summer comes out, The Dark Knight Rises, and you know I’m here to make an equally awesome pattern to commemorate it!
So some of you may know the little bat pattern I posted last year, well I used that pattern with a few differences to make today’s free pattern of a simple Batman Logo, but that’s not all…
-sc = Single Crochet -hdc = Half-double Crochet -dc = Double Crochet -m.p = Mini Picot (ch 2, sl.st in first ch)
-Ch = Chain
-Rnd = Round
Ch 16 Rnd 1: Skip first 2 chs, Hdc 1, m.p, hdc 1 in next two, sc 1, m.p, sc 1 in next three, m.p, sc 1 in next three, m.p, sc 1, hdc 1 in next two, m.p, hdc 1, sl.st 1 in same as last. Turn upside down and ch 2 (15) Rnd 2: *On backside. (In where you put the last hdc and sl.st) Dc 1, hdc 1 in next two, sc 1 in next three, m.p, sc 1 in next two, m.p, sc 1 in next three, hdc 1 in next two, dc 1 (14)
Bonjour!Comme j’aipromis la semaine dernière, pour célébrer le jourBastillepour nos amisen France, voiciun modèle pourun fuséede crochet! Et oui, je sais que mon français est mauvais hahaha.
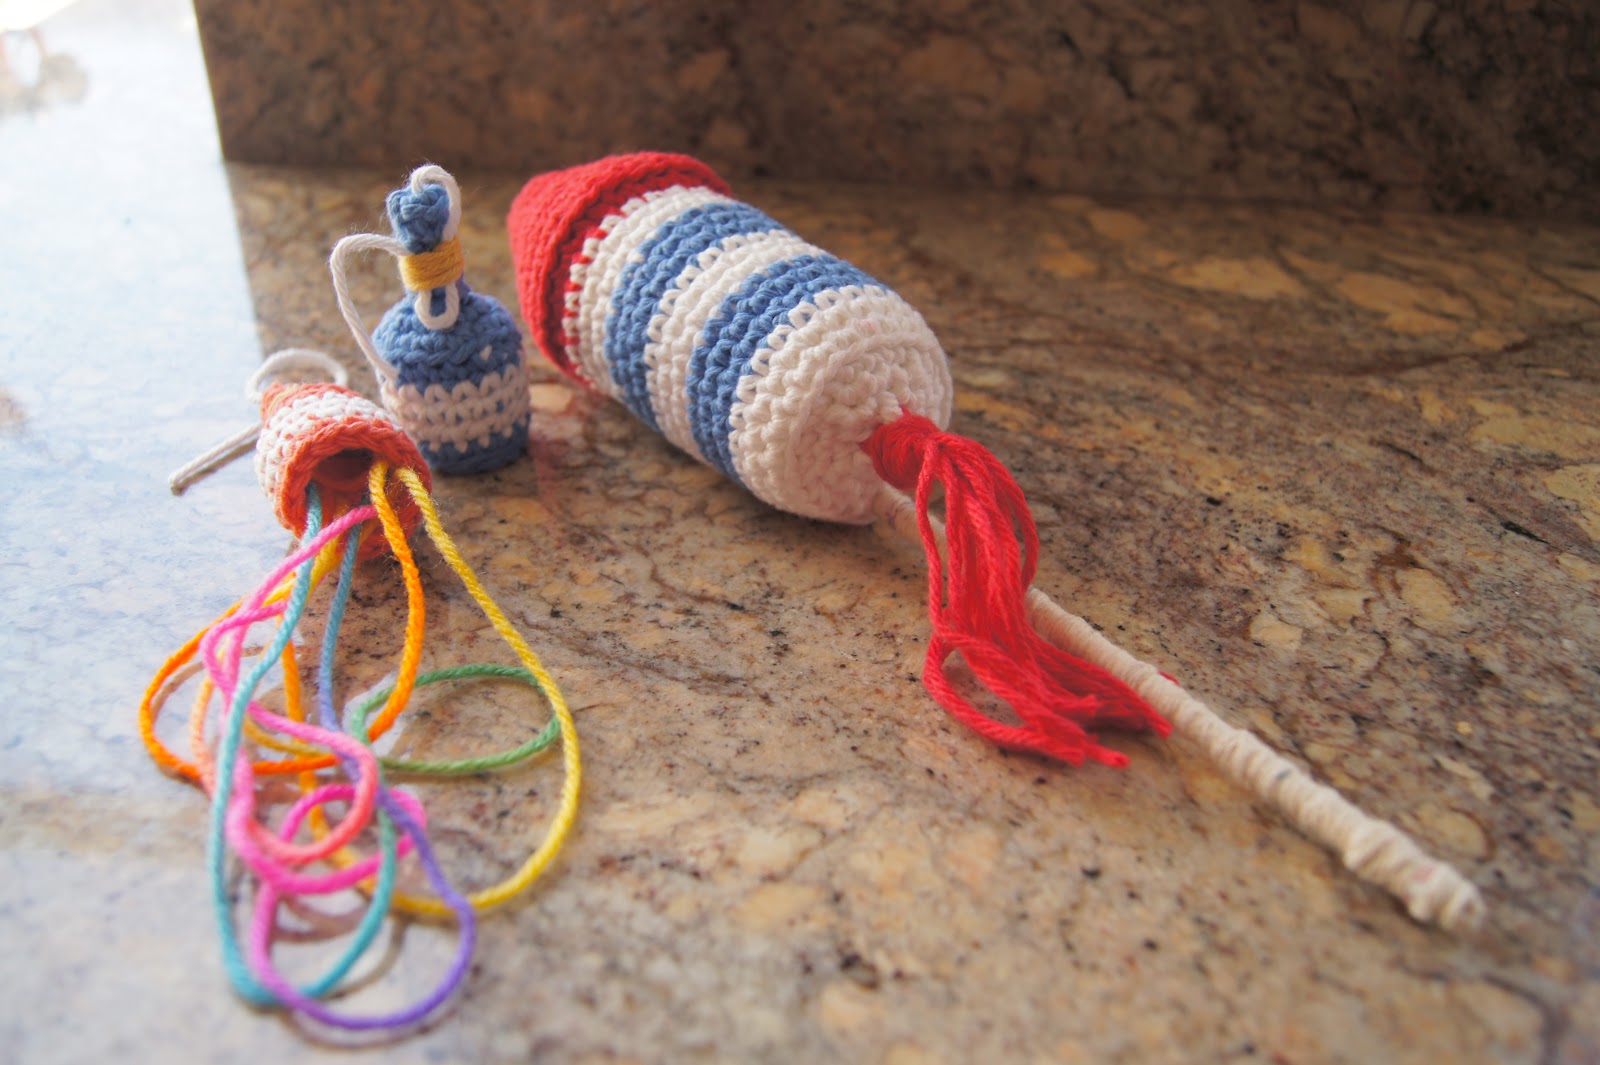
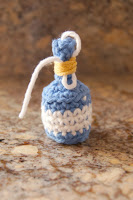
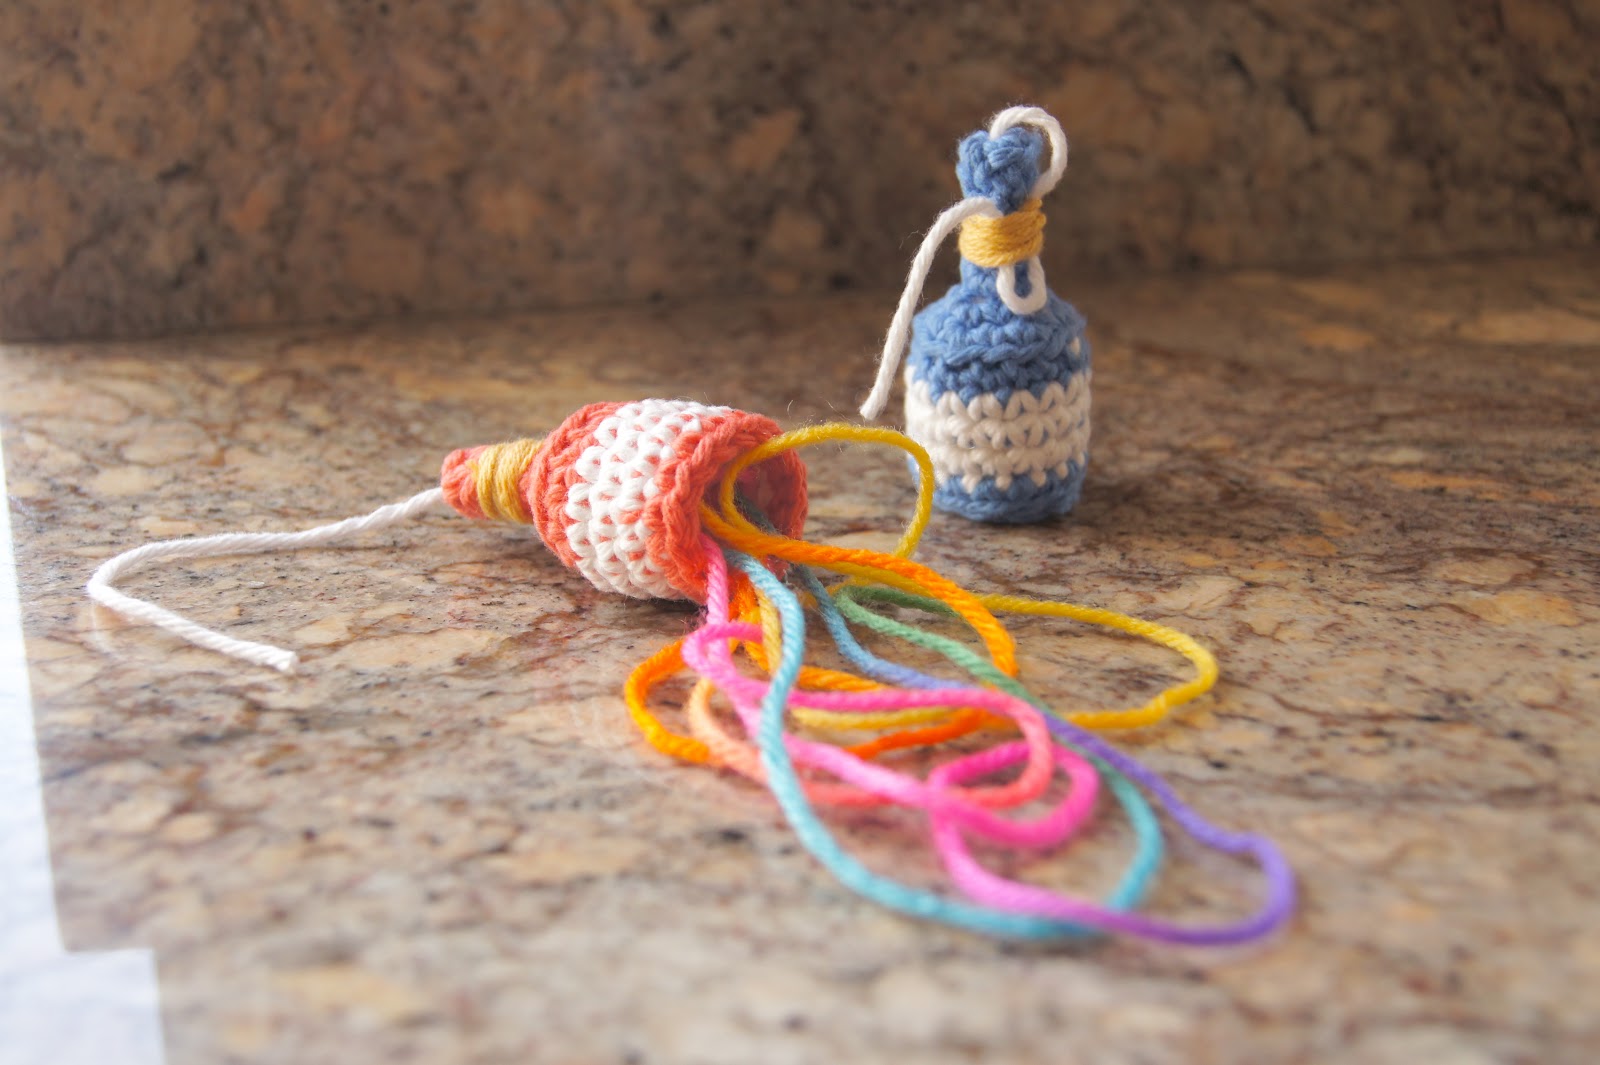
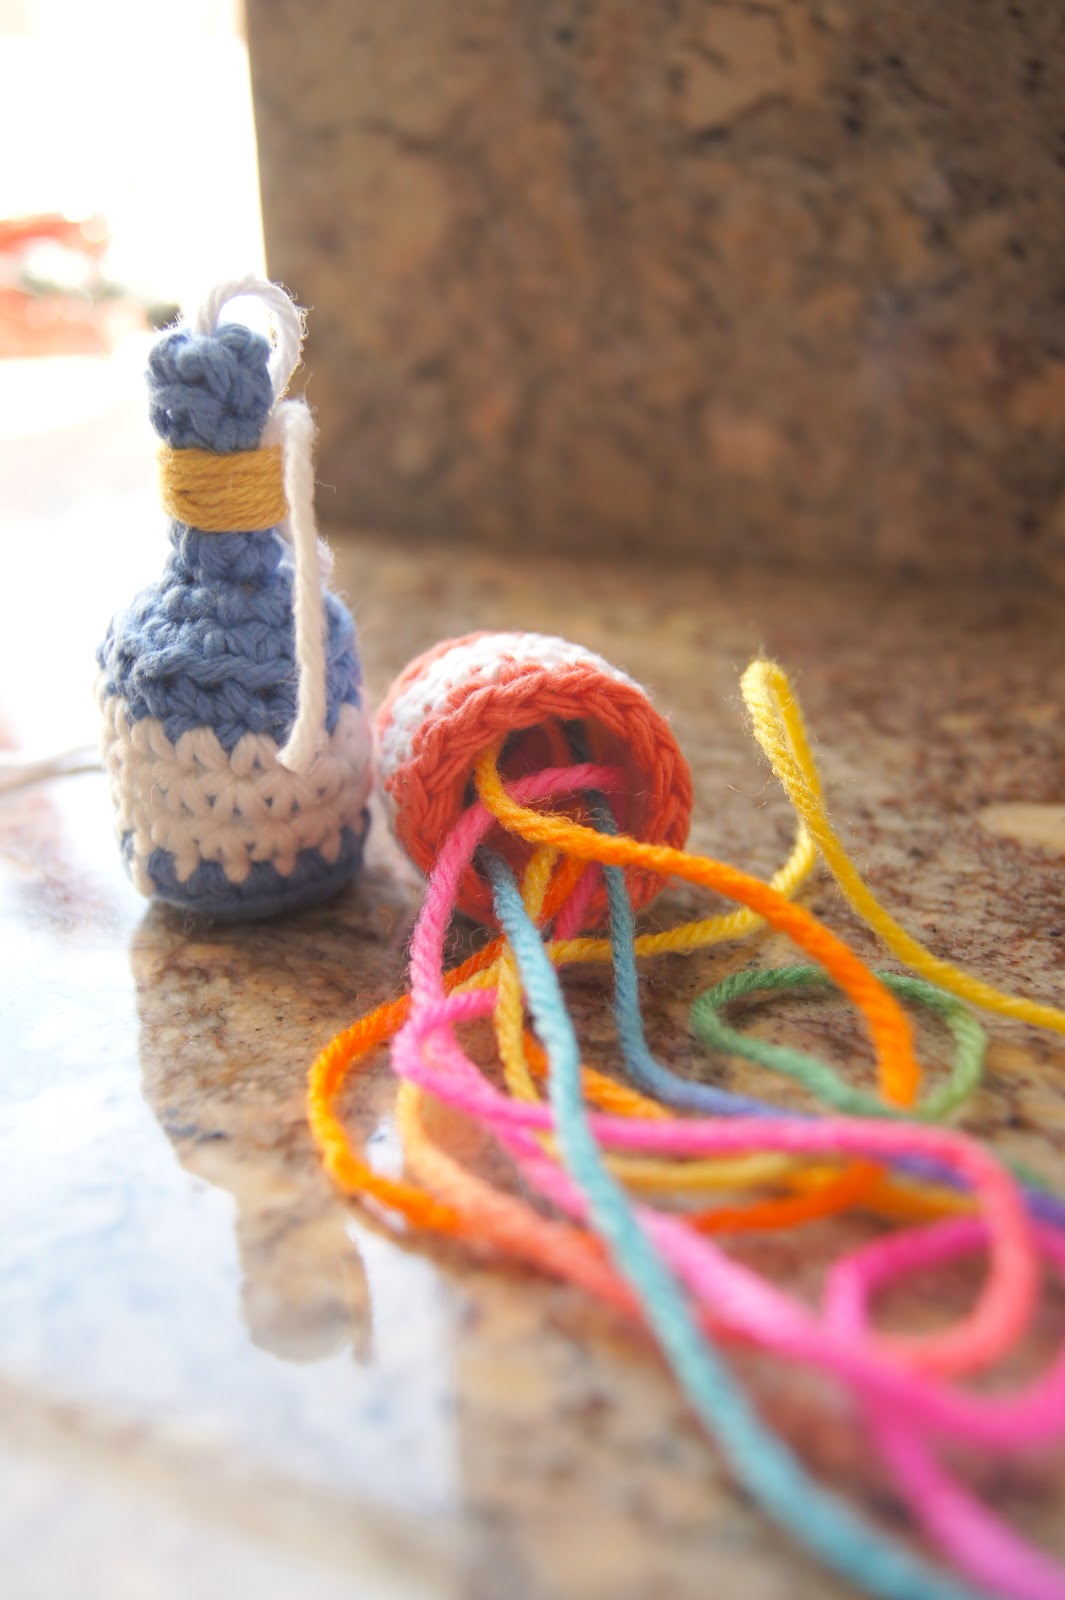
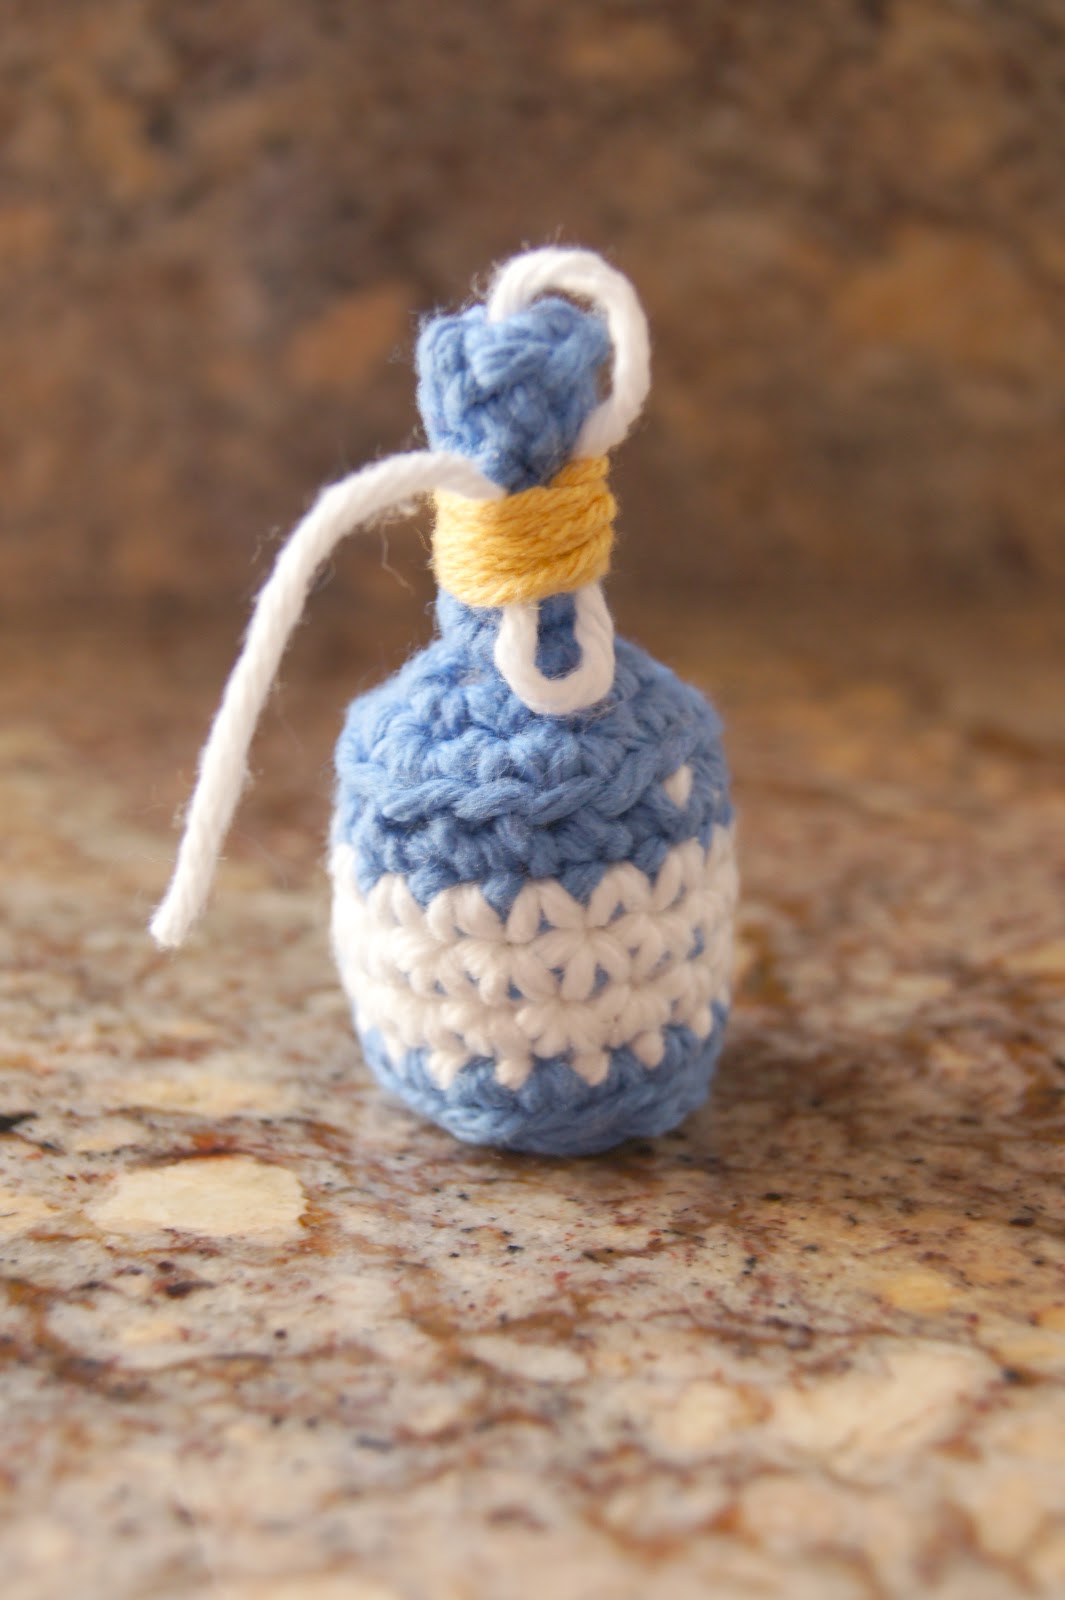
Kay, back to English, my french isn’t very great. So today I’m going to be posting a new pattern for a Crocheted Rocket / Firework to celebrate both our independence day in America (I know it’s a bit late haha) as well as Frances independence day! Wooo!!
To go along with this pattern, check out last weeks free Party Popper pattern here!
If you like these two patterns and want to help me out and donate for more free patterns in the future 😉 then feel free to buy both of these patterns on my Etsy HERE! They’ll be sent to you in a shiny PDF pattern in a matter of just a few hours! AND (yes there is an and) you’ll get a coupon for 25% off your next Louie’s Loops pattern!
In red Ch 2 Rnd 1: sc 5 in 2nd ch from hook (5) Rnd 2: sc 1 in each (5) Rnd 3: sc 2 in each (10) Rnd 4: sc 1 in each (10) Rnd 5: sc 1 in first, 2 in next, repeat 5 times (15) Rnd 6: sc 1 in each (15) Rnd 7: sc 1 in first two, 2 in next, repeat 5 times (20) Rnd 8: sc 1 in each (20) Rnd 9: sc 1 in first three, 2 in next, repeat 5 times (25) Rnd 10: sc 1 in each (25) Rnd 11: sc 1 in first four, 2 in next, repeat 5 times (30) Rnd 12: sc 1 in each (30) Rnd 13: in back stitches only, sc 1 in first four, dec in next, repeat 5 times (25) Change to white Rnd 14: in front stitches only, sc 1 in each (25) Rnd 15 – 17: sc 1 in each (25) *For American Rocket* Change to blue Rnd 18 – 21: repeat (25) *For American Rocket* Change to white Rnd 22 – 25: repeat (25) Change to blue Rnd 26 – 29: repeat (25) *For American Rocket* Change to white Rnd 30 – 33: repeat (25) *Stuff most of the rocket here and the rest after Rnd 34* Rnd 31: in back stitches only, sc 1 in first three, [if you’re adding a stick, ch 2 and skip one stitch as your first dec, continue as normal] dec in next, repeat 5 times (20) Rnd 32: sc 1 in first two, dec in next, repeat 5 times (15) Rnd 33: sc 1 in first, dec in next, repeat 5 times (10) Rnd 34: dec in each (5) Rnd 35: pull one through each st, and last through all, cut off and sew into center. * For fire, sew multiple strands off yarn (7 – 10) into the bottom of the rocket, then tie them in a knot. Cut evenly * For a yarn stick tie a string around a stick and wrap the yarn around the stick sewing into the wrapped section at the end.
Don’t forget, you can definitely donate by buying this and the pattern for the rocket in an awesomely made PDF format –> HERE on my Etsy store <– AND get a coupon for 25% off your next pattern!
Happy July 4th everyone (mostly those in America I guess haha). I had planned on putting out two new free patterns for today, but seeing as Bastille Day is right around the corner I felt I should save one for mon amis en France as well!
But have no fear, if you truly want both patterns now, or you just want to help me out and donate for more free patterns in the future 😉 then feel free to buy both of these patterns on my Etsy HERE! They’ll be sent to you in a shiny PDF pattern in a matter of just a few hours! AND (yes there is an and) you’ll get a coupon for 25% off your next Louie’s Loops pattern!
Again though, the rocket pattern will be here on the 14th so if you want to wait, and don’t want to donate 🙁 (haha) then feel free to wait! If not here’s where you can get it now.
So here’s the pattern for today, party poppers! Great for birthdays, new years, or the 4th of July!!
In color Ch 2 Rnd 1: sc 5 in 2nd ch from hook (5) Rnd 2: in back stitches only, sc 1 in each (5) Rnd 3: sc 1 in each (5) Rnd 4: repeat Rnd 5: in front stitches only, sc 2 in each (10) Rnd 6: sc 1 in first, 2 in next, repeat 5 times (15) Rnd 7: in back stitches only, sc 1 in each (15) Pull a long end of the white yarn in from the top through the hole in the beginning, Change to white Rnd 8 – 10: sc 1 in each (15) Change tocolor Rnd 11: sc 1 in each (15)
To make a top In white Ch 2 Rnd 12: sc 5 in 2nd ch from hook (5) Rnd 13: sc 2 in each (10) Stuff the popper and sew onto top.
Take yellow or gold yarn and tie around the handle section of Rnd 2 – 4 and wrap around the white string to make the gold band.
Don’t forget, you can definitely donate by buying this and the pattern for the rocket (coming free on July 14th) in an awesomely made PDF format –>HERE on my Etsy store <– AND get a coupon for 25% off your next pattern!
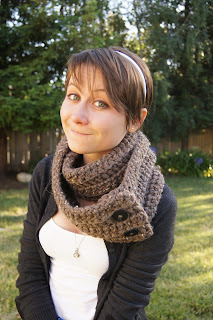
In three weeks my girlfriend and I will be moving up to San Francisco, where I hear it gets a bit cold. I had some extra yarn and decided I’d make her a warm gift. It’s super easy to make so I decided to share with you guys the pattern of how to make a nice simple button infinity scarf.
By the way, this is my cousin, whom you may recognize
Ch 102 (or to desired length) Rnd 1: Skip first two ch’s, dc 100, turn (100) Rnd 2: ch 2, skip ch’s, in back stitches only dc 100, turn (100) Rnd 3: Repeat Rnd 4: Repeat Rnd 5: Repeat Cut and tie off, sew in ends. Sew on two (or more) 1 1/4″ buttons to one side of the scarf. The buttons should fit perfectly between the dc bars while still holding in securely.
That’s it!! See how easy that is? Took me about an hour to finish and about one whole ball of the yarn.
Check back soon because I may begin selling these depending on how much people like it! Let me know!!
It’s not too late by the way! Comment on this post, or crochet one of these and take a photo to receive extra entries in the Awesome June Giveaway! For other ways to enter click here!!
So I’ve got something a little bit different for you guys today. I came out with a new pattern for purchase in the Etsy, Ravelry and Craftsy stores: the Aviator Earflap Hat. You can get the pattern HERE for just 3.50$.
But that’s not all! I also am giving away the free instructions on how to add your own tassels to any hats you want! The instructions are also available in the purchased pattern as well as a lot more.
——————————————————————————————————————————
So here’s the Aviator Earflap Hat pattern for purchase.
Lastly, don’t forget to enter to win $50 to my Etsy this month by comenting on this post and purchasing the pattern above! For more ways to enter click HERE!!
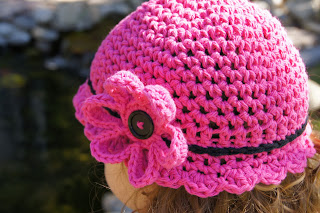
So it’s summer, and here’s an awesome new free pattern for you guys! You may have seen these flowers on some of the girl hats I make in my shop. Check the hat’s out HERE.
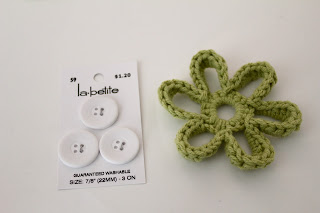
The great thing about these flowers is that they fit perfectly to a 7/8″ (20mm) button, so all you have to do is sew a button on something and you can change the flowers whenever you want!
Also, don’t forget, there is a giveaway going on right now! You could win $50 to my Etsy shop!! If you finish one of these flowers and send me a photo you can get extra entries in!! Also you get an entry for simply commenting on this post! To see a complete list of rules and how to enter, click HERE.
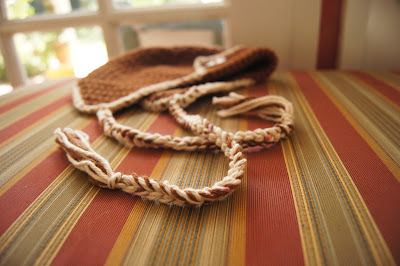
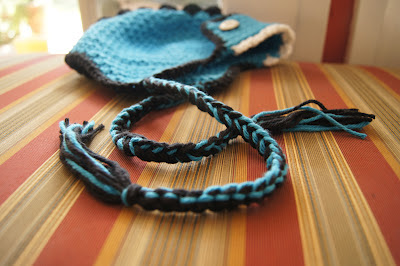
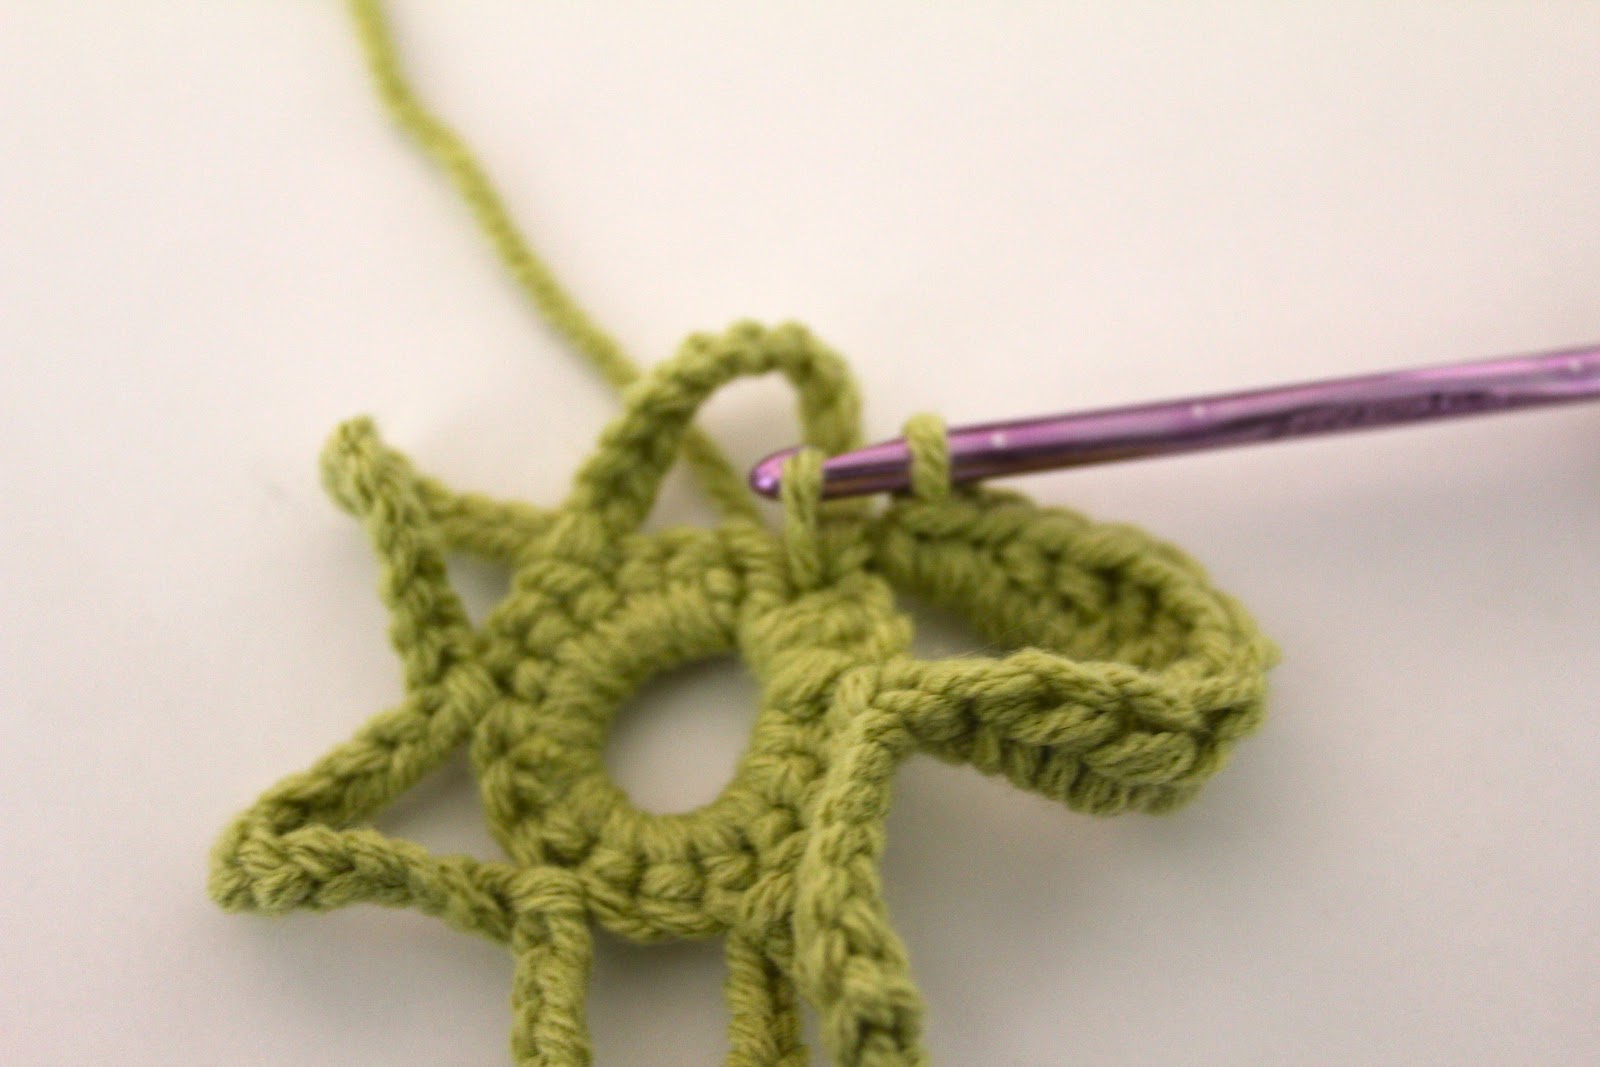
Ch 9, pull loop through first ch made. Rnd 1: sc 18 around the loop of ch’s *not in ch’s*, sl.st in first sc made, don’t turn (18) [image 1] Rnd 2: ch 12, skip 2 sts, sl.st in 3rd, repeat this 6 times. [image 2] Rnd 3: Around each of the ch loops made in Rnd 2: sc 2, hdc 2, dc 4, hdc 2, sc 2, then sl.st where you made the sl.sts in Rnd 2 (12 in each loop, 72 total) [images 3 and 4]
To finish, cut and pull through the remaining yarn and sew it into the body of the flower to hide it. Done! Now just get a 7/8” (20mm) button and you can put it anywhere!
So last weekend The Avengers hit theaters and it was awesome!! I’m used to be really big into comics when I was younger, my favorite of which were the Fantastic Four. I thought Mr. Fantastic was just the coolest super hero and his brains mixed with his abilities made him the most awesome of superheros. But alas, the movies sucked haha.
Anyhow, I saw The Avengers last weekend and it was just so good. Later, while browsing through Etsy I stumbled upon a shop called Nerdifacts. They make the coolest fingerless gloves to mimic super hero gauntlets. I thought they were pretty cool, so I made my own version of one of her pairs, Iron Mans. Not only did I make a pair for my cousin, but I decided to share the pattern for all of you guys! This way you can make yourself a pair to prepare for your next viewing of The Avengers! Download at bottom of the page or here.
Here are some photos of the final product…
This was my best “kick bad guy ass” pose, haha.
Again, the credit for the idea of these Iron Man Gauntlets goes to Nerdifacts, check out their shop here. You can see a bunch of different ideas for different versions of the fingerless gloves there too.
——————————————————————————————————————————
So here’s the pattern for download, and don’t forget, this pattern may be for Iron Man Gloves, but it includes instructions for making my version of Fingerless Mittens as-well.
Finally, a new FREE pattern for you guys, and I made it into a cool, fancy PDF too!
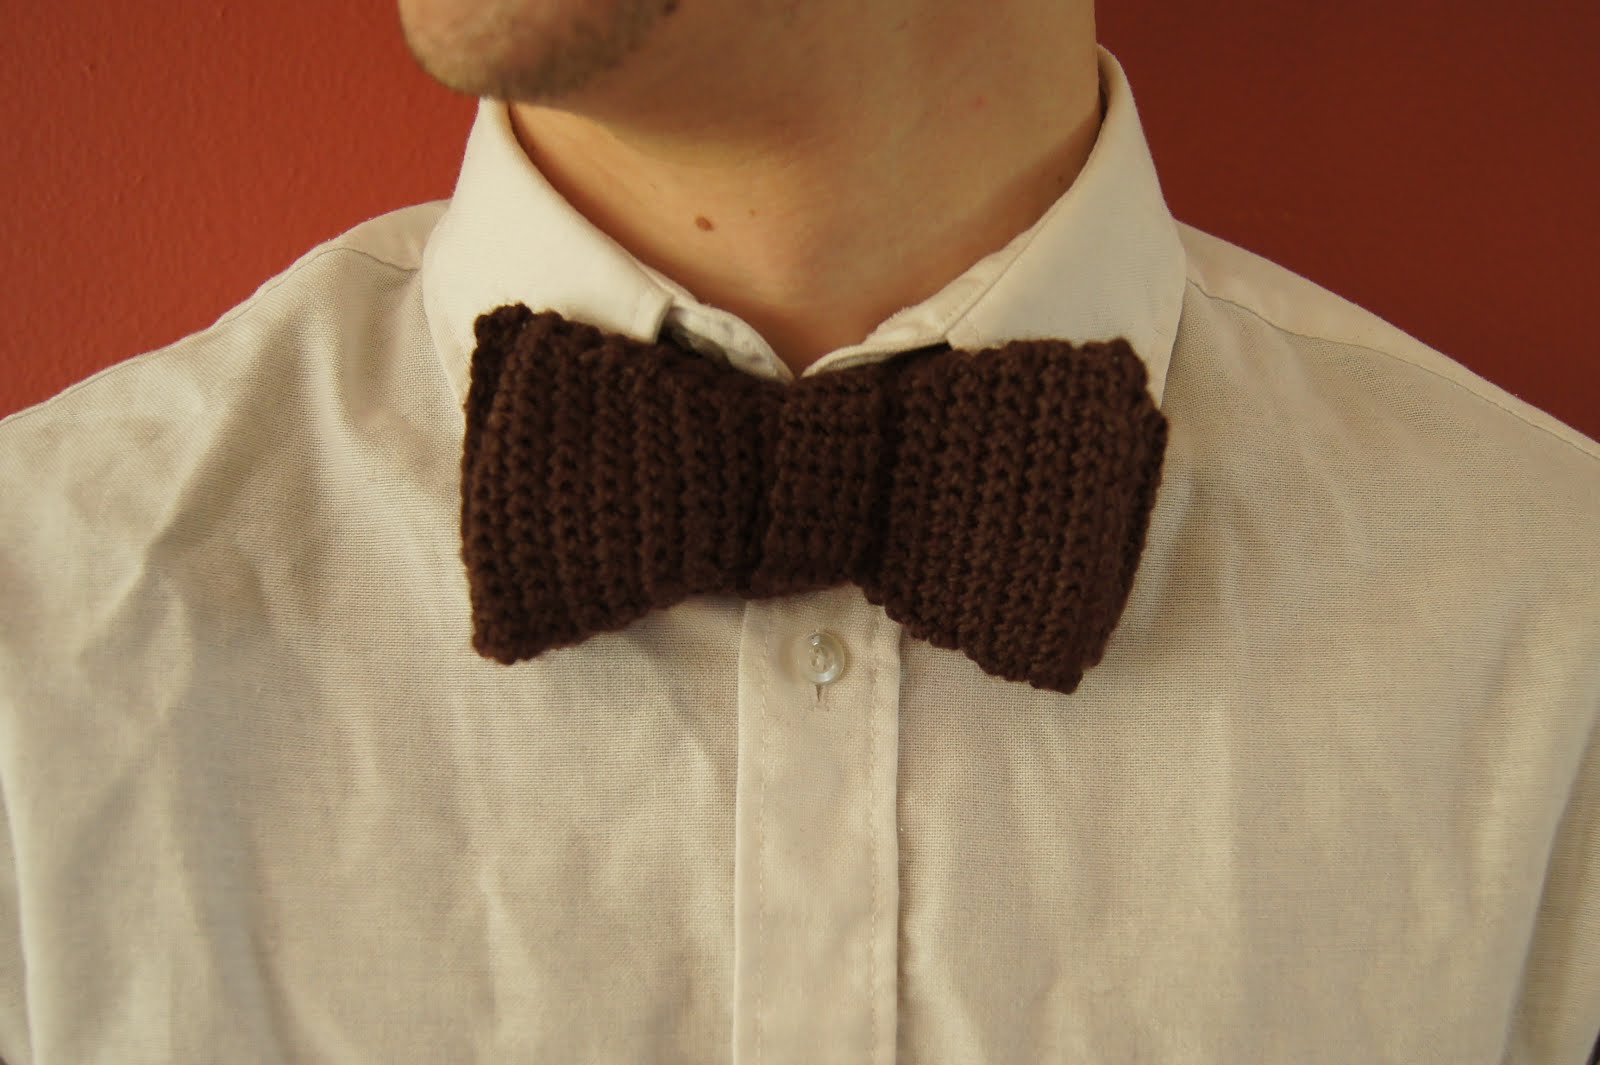
So I was bored one day and wanted to make a bow tie, I looked all over for patterns on making one, but all I could find were patterns for pre-tied bow ties, and where’s the fun in that! So I made my own :). I thought, well since there aren’t any I could find, I might as well post one. You can buy one of these bow ties too, right here.
Here are some photos, scroll down to view and download the pattern.
Don’t forget to add this pattern to your favorites on Ravelry and Craftsy, pin-it and share it on Facebook too!!
Don’t forget, you can buy one of these bow ties too! HERE
Here’s the dealio, I want to be able to give all my patterns for free, and I would if I could, but I can’t. I can’t because it takes lots of time to make them and make sure it looks pretty, and I’m a student and don’t make a lot of money as it is, so here’s my idea, if you like this pattern please hit the button to the top right to donate a little something; you don’t have to (obviously) but it would mean a lot to me and show me that people do want more patterns.
Hey guys! Just wanted to let you know, there’s a new item to the Etsy page today! In fact, its the first pattern up for sale! Allow me to introduce you to the Crocheted Rosie the Riveter WWII Headband Pattern, only $3! Buy the pattern here!
You can also buy one of these bad boys in Navy Blue, Royal Red, or Sea-foam Green Here.

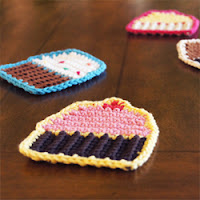 If you didn’t know, Brenda from Sweet Simple Stuff and I did a blog swap last week. Her blog consists of candy, baked goods, and lots of cute idea’s for sweets, so, for our swap, she posted some not so fat free granny squares, you can check them out here, and I posted a free pattern for my Crocheted Cupcake Coasters (that’s an alliteration for all you grammar geeks out there 😉
 You can buy these coasters on my Etsy here.