Category Archives: Amigurumi

How to crochet: Kirby!

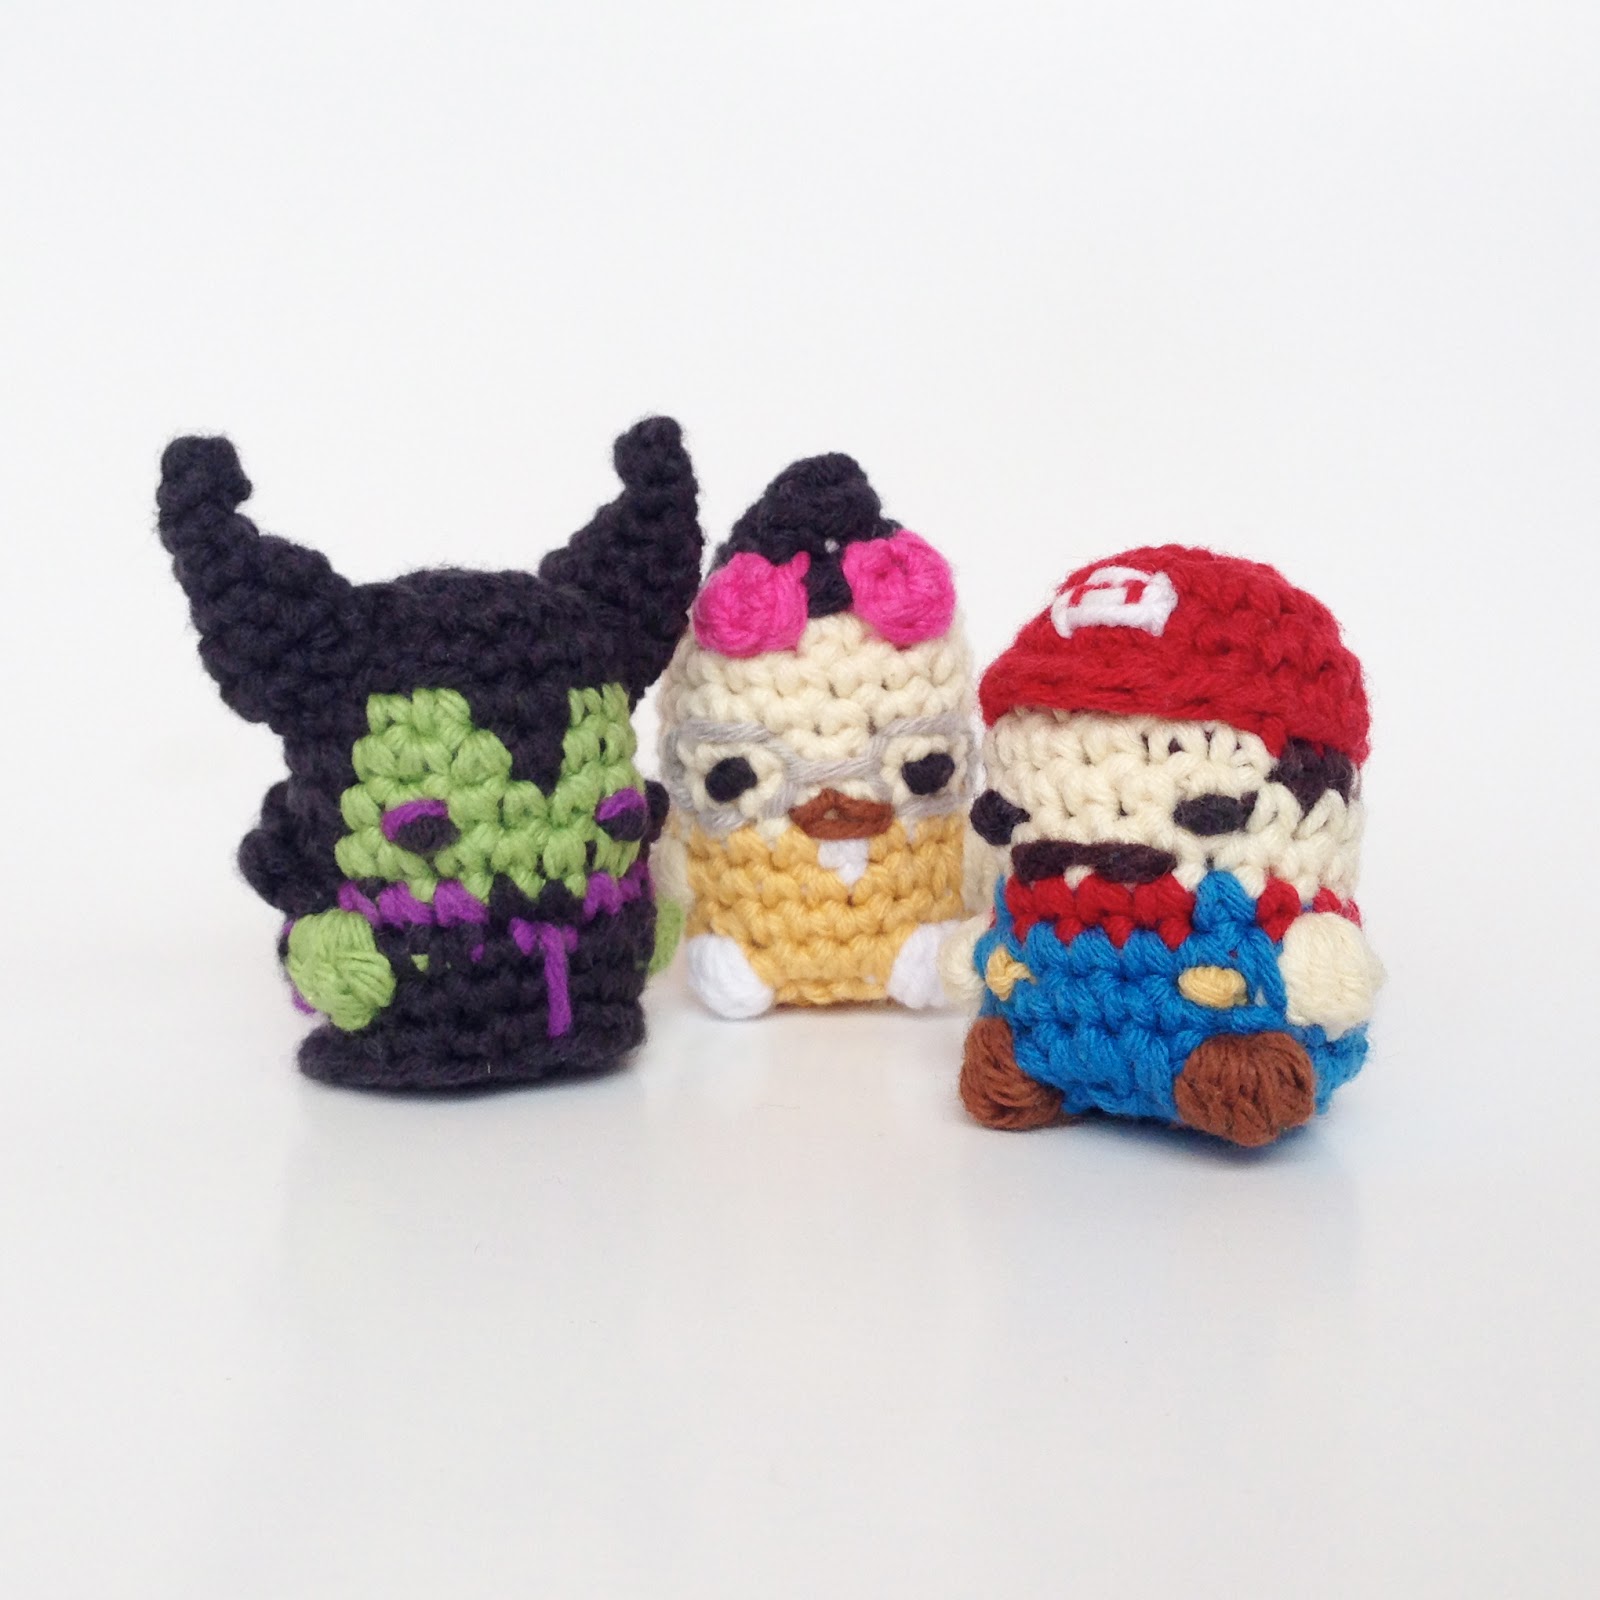
Hey guys! This may be one of the biggest free patterns I’ve ever come out with, but I got a loooot of requests for it so I figured why not! So first off, I just came out with a pattern for how to make Mario, Luigi, Wario and Waluigi! You guys should check it out in the Etsy store!

Okay, well let’s get to business, here’s a couple videos for the pattern and the written version can be found below! Let me know what you think in the comments and please if you haven’t already,
subscribe on YouTube!


Materials:
(basically any 100% cotton works)
Needle to sew in ends with

Abbreviations:
-sc = Single Crochet
-inc = Increase (sc 2 in one st)
-dec = Decrease (sc 2 together)
-bo = Bobble stitch (how to here)
-ch = Chain
-st = Stitch
-Rnd = Round
In pink Ch 2
Rnd 1: sc 6 in the second ch from the hook. Don’t turn. (6)

Rnd 2: sc 2 (inc) in each st around. (12)

Rnd 3: sc in each st around (12)

Rnd 4: sc in next st, inc in next st, repeat 6 times (18)

Rnd 5: sc in each st around (18)

Rnd 6: bo (bobble stitch) in first, sc one in next 7 sts, bo in next, sc one in last 9 sts (18; 2 bo, 16 sc)

Rnd 7: sc in each st around (18)
Sew on eyes here (see video part 1 at ~10:45)

– Switch to video part 2 here –
Rnd 8: sc in first 2 sts, bo in next (in red), sc one in next 4 sts, bo in next (in red) sc in next 10 sts (18; 2 bo, 16 sc)
Sew on a mouth in red here

See video here for how to stuff and finish.
Rnd 9: sc in first st, dec in next, repeat 6 times (12)

Rnd 10: dec in each st around (6)

Done! Now don’t forget to keep your mini Kirby away from any food, he has a tendency to eat anything and everything around him and turn it into little weapons.

How to Crochet: a Bomb

Hey guys! I’ve got a brand new pattern today for you guys and even made a video for it! I also added these little Bob-omb’s and Bombs to the Etsy store today so check them out there!

Also there’s a new pattern up for Mario, Luigi, Wario, and Waluigi up there too for only 2.99!!


Materials:
(basically any 100% cotton works)
Needle to sew in ends with

Abbreviations:
-sc = Single Crochet
-inc = Increase (sc 2 in one st)
-dec = Decrease (sc 2 together)
-hdc = Half-Double Crochet
-ch = Chain
-st = Stitch
-Rnd = Round

Top

In color A (grey) Ch 2
Rnd 1: sc 3 in 2nd ch from the hook, sl.st in the first sc made. Don’t turn. (3)
Cut and pull through leaving a long end to sew onto the top of the bomb.

Feet (make two)
In color B (yellow) Ch 3

Rnd 1: sc 1 in second ch from the hook, sl.st 2 in the next ch. Flip over. (3)
Rnd 2: sc one in the same st you made the sl.st’s in, sl.st in next ch over (2)
I know this part seems confusing, but basically you’re just making a tiny oval by working sc’s and sl.st’s on one side of a ch, then turning the piece upside-down and working into the back side of the same ch’s. Cut leaving a somewhat long end for sewing onto the piece.

Crank (back side of Bob-omb)
In color B (yellow) Ch 5
Rnd 1: skip first two chs, hdc in 3rd ch from hook, sc in next ch, ch 1, hdc 1 and sl.st in the last ch (4)
Cut and pull through leaving a somewhat long end again for sewing onto the backside of the bob-omb.

Main part
In color C (black) Ch 2
Rnd 1: sc 6 in the second ch from the hook. Don’t turn. (6)
Rnd 2: sc 2 (inc) in each st around. (12)
Rnd 3: sc in first 3 sts, inc in next, repeat x 3 (15)
Sew on the Top part here
Rnd 4 – 6: sc in each st around (15)
Make the wick here (see video above). Sew on eyes here. See this video for instructions on how to sew on eyes.
Rnd 7: sc in first 3 sts, dec in next, repeat x 3 (12)
Sew on the Crank here
Rnd 8: dec in each st around. (6)
Sew on the Feet here.
Finish off by stuffing your piece and sewing together the bottom. See this video for instructions on how to finish off.

Done! Now you have your very own miniature Bob-omb! Don’t cause too much havoc with him.

Oh, and check out the pattern for Mario, Luigi, Wario and Waluigi in my shop now for only 2.99!! 

How to make Hair for your Amigurumi

Hey guys! I’ve got a new tutorial for you guys! I realzed while making a pattern that it’s really tough to explain how I make hair via text, so I thought it’d probably just be easiest to make a video for it! So here you go, a video showing how I make the hair for my amigurumis, and check out the new pattern for Jon Snow that’s up today in the Etsy store!


“Crochet Me”


If you guys didn’t know, I do a series on my YouTube channel called “Crochet Me“. Basically, for each episode I crochet a different YouTuber and a viewer and do a time-lapse of me crocheting the YouTuber.

Well I havn’t been posting them very often here, so I figured I’d just do a dump of the first 8 episodes of Crochet Me. See if you know any of the YouTubers, and let me know if there are any YouTubers you’d like me to make!

Also, if you or someone you know wants to be crocheted, I choose one viewer an episode to crochet, here are some examples of the people I’ve made.

If you want to be crocheted just post a picture to Twitter or Instagram to @louiesloops with #crochetmelouie

Hope you guys like these!

Watch me Crochet: Maleficent

Hey guys! Came out with a new episode of “Watch me Crochet” yesterday where I make Maleficent from Disney’s Sleeping Beauty, as well as in her new movie Maleficent! She was really fun to make, and is available in the Etsy store today!

I’m thinking of coming out with a pattern for her soon, but not sure how to go about that just yet as it is pretty dang complicated, but we’ll see.

Hope you guys like the video!


Here’s some more photos of her:

How to crochet: “Splitting”


Hey guys, so I’ve been using this technique for a while while crocheting that I call “splitting” where I split a row in half. Not sure what it’s really called, but figured that was a pretty decent name for it.

I use it in my amigurumi to make things like hoodies and hat brims, and used it a lot when I made Maleficent here. Anyhow, just thought I’d share it and show you guys how I do that and some things I make with it in a video. I’ll probably be coming out with a whole bunch of amigurumi tutorials pretty soon and going to definitely be posting some longer detailed stuff on my Patreon page here in the not so distant future.

Enjoy!

How to Crochet a PokeBall and tons of other Pokemon stuff!


Hitting it hard right here with a BUNCH of new stuff including a few new patterns, tutorials, Watch me Crochet and even a Giveaway, all Pokémon related!!

So to start, check out this Watch me Crochet for Ash Ketchum and be sure to check out the free giveaway I’m doing for one of these Pokéballs!

Okay so here’s the thing, I’m giving away three of these Pokéballs (which are also available for sale in the Etsy store for only $5!). How you can win one of these is simply guess what Pokémon this guy is!

I made him a few weeks back for a custom order and figured it would be a fun little game for you guys. If you guys like it I’ll be happy to continue this trend and make some more Pokémon.

To guess simply go to the YouTube video here, Instagram post, Twitter post, or Facebook post and say who you think the Pokémon is in a comment!! I’ll choose three correct answers next week to send some Pokeballs to!

So that’s not all, if you know how to crochet, you can learn how to make one of these Pokéballs with this free pattern I did a video of last week!

I hope you guys like this and let me know in the comments if you guys would like to see any different patterns!

Materials:
-Lion Brand Cotton-Ease Yarn

-Crochet Hook-Size G 4.50mm
-Needle to sew in ends with
Abbreviations:

-Sc : Single Crochet   

-Inc: Increase (sc 2 in st)
-Dec: Decrease

-St : Stitch or stitches


Button (to be sewn onto front of Pokeball)

In white, Ch 2 or use adjustable ring (Don’t Turn)
Rnd 1: sc 3 in 2nd ch from the hook (3)
Cut, leaving a long end to use when sewing onto ball

Starting in red
Ch 2 or use adjustable ring (Don’t Turn)

Rnd 1: sc 6 in 2nd ch from the hook (6)

Rnd 2: sc 2 in each st (12)

Rnd 3: sc in first 4 sts, inc in next, repeat 3 times (15)
Rnd 4: sc in each st around (15)
Rnd 5: sc in each st around (15)
Change to white
Rnd 6: sc in each st around (15)
Sew button on here.
Rnd 7: sc in first 3 sts, dec in next, repeat 3 times (12)
Rnd 8: dec in each st (6)
Cut, stuff and sew together [see video here for instructions]

I know it’s a lot to take in. If you want to get updated on new stuff quicker make sure to check out my YouTube for videos, and Instagram, Facebook, and Twitter where I post every time there’s something new!

Oops. Gotta play catch up!

Hey guys so I keep forgetting to post my patterns here! They’ve been coming out every week on my YouTube here, but I keep forgetting to put the new content here, and I’m sorry about that. So I’m going to remember to post them here and play catch-up this week, so prepare to get an influx of posts really quick.

Here are some of the things I’ve been posting on my YouTube and stuff. If you want to keep updated on that stuff subscribe to me on YouTube and check out my Instagram, Twitter and Facebook!